WordPress 6.3 has just been released. This particular release is special, because it marks the completion of Phase 2: Customization in WordPress development. However, it certainly doesn’t mean that the customization work has stopped and finished. On the contrary the refinement work will still continue, but it will not be the major focus of the Gutenberg project anymore as it shifts into Phase 3: Collaboration.
As you may already know, the new WordPress is being developed in four phases. Phase 1 was focused on the development of the new block editor, named Gutenberg, which focuses solely of content editing. Phase 2 focuses on the integration of this block editor across an entire website as a cohesive full site editing suite. This means that we can now build the entire website using only blocks.
In light of this new tool in hand and a curious mind to fulfill its promise, I challenged myself to recreate one of the most popular classic themes into a block theme. For this project, I chose Twenty Seventeen theme which currently has 600k+ active installations.
- Main processes
- Development environment
- Summary of key design elements
- Building the theme
- What cannot be recreated without some code
- Theme repository on GitHub
My basic approach to this project is to build the theme as fast and easy as possible. This means I’ll be relying heavily on the Site Editor to help me build the theme with no code, and use as little custom CSS as possible. To achieve this, I use Twenty Twenty-Three theme as a baseline, on which I’ll build the Twenty Seventeen block version. But since my main goal is to build a theme, not a site, because I want the new theme to be installable on other sites and not attach to only one site, I need the help of a plugin named Create Block Theme to save all the changes to theme.json file and not the WordPress site’s database.
Main processes
The development of the theme mainly consists of the following processes.
- Gathering information about Twenty Seventy’s layout, color palette, and font styles.
- Cloning Twenty Twenty-Three theme using Create Block Theme plugin.
- Naming the new theme tseventeen block.
- Removing the cloned theme’s inherited style variations from the previous theme, but excluded the default style. This is done by deleting the
/styles folder. - Applying the layout, color palette and font style into the new theme’s Global Style. In this process, I aimed to use core blocks and as little custom CSS as possible. However, since the Site Editor does not yet support SVG icons insertion, I installed The Icon Block plugin to help me with it.
Development environment
- WordPress 6.3
- Twenty Twenty-Three theme
- Create Block Theme plugin
- The Icon Block plugin
When I began recreating the theme, I was using WordPress 6.2.2 with the latest Gutenberg version, and I tested it on WordPress 6.3 Beta/RC releases. However, now that WordPress 6.3 has been officially released, you can use that environment as your development or deployment site. This is possible because all the necessary Gutenberg features that are required to build the theme are now provided natively in WordPress 6.3, except for the SVG icons insertion. To handle this particular task, I rely on The Icon Block plugin to assist in inserting a couple of SVG icons into the new theme.
To gather the essential styles and layout details of the Twenty Seventeen classic theme, I installed the theme on a test site, and used the browser’s Web Developer Tools to inspect the site’s elements. Here’s the summary of what I found.
Summary of key design elements
Layout
- Content width: 890px; Wide width: 1280px.
- Sticky navigation just below the header, which remains visible on all pages.
- Two distinct header designs: one for the homepage featuring a full-screen-sized image, and a shorter version for pages and posts.
- Consistent two-column layout for all pages.
- Inclusion of a sidebar in all blog posts, displaying the latest post.
- A single footer design that is applied to all pages.
Color palette
Base
#FFF
Contrast
#333333
Primary
#333333
Secondary
#767676
Tertiary
#F6F6F6
Font styles
The Twenty Seventeen theme exclusively employs Libre Franklin Thin utilizing the regular, light and extra bold weights. The headings are structured as follow:
| Headings | Weight | Size | Line Height | Color |
|---|---|---|---|---|
| H1 | Light / 300 | 1.87rem | 1.4 | #333 |
| H2 | Light / 300 | 1.625rem | 1.4 | #666 |
| H3 | Light / 300 | 1.375rem | 1.4 | #333 |
| H4 | Extra bold / 800 | 1.125rem | 1.4 | #333 |
| H5 | Extra bold / 800 | 0.815rem | 1.4 | #767676 |
| H6 | Extra bold / 800 | 1rem | 1.4 | #333 |
| Paragraph | Regular / 400 | 18px | 27px | #333 |
To collect all the essential information about the style of a classic theme, I found it more convenient to create a dedicated page (e.g., naming it “style page”) that contains all the heading levels, paragraphs, buttons, or any other elements, that I needed to inspect later using the browser’s developer tools. Fortunately, since WordPress 6.2, this type of comprehensive style reference is referred to as a Style Book. This feature empowers us to globally customize the site’s styles, making it a powerful tool for theme development.
Building the theme
Set up the Global Styles
With the design elements in hand, I applied the color palette, the font styles and layouts site-wide as a global style. Subsequently, I created the necessary templates. These processes should be done in the Global Style interface inside the Site Editor.

Global layout
To configure the global layout. Navigate to Global Style > Layout > Enter 890 px into the content field and and 1280px into wide field. This global layout configuration process will continue in the templates creation.
Global color
The next step is color palette configuration. To create the palette, follow this steps: Navigate to Colors > Palette > Custom + > select a color and give each color a name according to your preference. I followed a basic color palette approach which consists of base, contrast, primary, secondary and tertiary colors.

Global font
In my previous post, I documented the process to directly upload fonts via a file manager. However, with the support for font management now available in Create Block Theme, I can utilize it to register fonts. It’s worth noting that a font library will become part of the core in WordPress 6.4.
I preferred to have a variable font for flexibility. To do this, I went to the Google Font page to download the files, and uploaded the variable font files to the theme’s directory by following this steps: Appearance > Managing Theme Fonts > Add Local Font > select LibreFranklin-VariableFont_wght.ttf and LibreFranklin-Italic-VariableFont_wght.ttf
If you prefer to upload static fonts instead.
Upload the font via Create Block Theme. Appearance > Manage Theme Fonts > select Add Google Font > select Libre Franklin > select weight 300, 400 and 800 each for normal and italic styles. You’ll see 6 (six) static font files listed under /tseventeen/assets/fonts folder.
To specify headings styles globally, let’s take H1 as an example.
| Headings | Weight | Size | Line Height | Color |
|---|---|---|---|---|
| H1 | Light / 300 | 1.87rem | 1.4 | #333 |
Initially, I noticed that the headings have 2 (two) distinct properties: font styles and text color. However, I was not aware that I can set every heading levels’ color via the Site Editor. Previously, I had considered using custom CSS or specifying the heading color via theme.json file. It was only when I delved deeper into the global color settings that I stumbled upon this option.
So the heading color and heading style need to be configured separately. Follow these steps to set the font styles:
- Go to Global Style > Typography > Headings.
- Select H1.
- Choose “Libre Franklin Thin” as the font.
- Set the size to custom 1.87rem.
- For appearance, choose Light.
- Set the line height to 1.4.
Now, to set the H1 text color, follow these steps:
- Go to Colors > Color.
- Select the three dots menu (color options).
- Scroll down and choose H1.
- In the color selector, select the primary color (#333) as the text color.
This approach allows you to customize both the font style and text color for H1 headings in a straightforward manner.

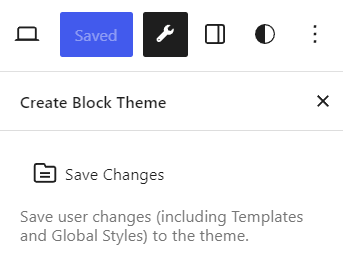
Checkpoint : Save user changes
Once I completed configuring the global color palette and fonts, I saved these settings to the theme.json file using Custom Block Theme. Here are the steps I followed:
- Look for a wrench icon among the top right icons (refer to the image below) in the Site Editor.
- Select Save Changes options.
I repeated this step several times, treating it as checkpoints, whenever I needed to save the changes to the theme.json file. This practice ensured that my progress was consistently saved, both during the theme development process and upon its completion.
Templates creation
I then moved to templates, template parts and patterns creation. This part is the continuation of setting up a global layout mentioned earlier.
Given that this project involved transforming a classic theme into a block theme. I aimed to ensure the user adoption of the new theme as seamless as possible. With this in mind, I chose to retain the “old way” of setting up a static homepage via the Reading options to maintain some familiarity. This approach, allow users to create their homepage while having the Front Page template renders the content.
In my post on front page display priority, I understand that a front page template will take precedent over any other templates or pages. However, this gives me dilemma. On one side, I don’t want user to manually edit the front page template with their content, mainly because I want to stay faithful to a separation between template and content. On the other hand, I can also see that the usage of a Front Page template in combination with the user’s static homepage will lead to confusion, as the two objects will cause a display conflict from the user perspective.
I also considered using a Blog Home template as the homepage template, since the homepage contains a section of the latest posts. However, I was concerned about potential conflicts with a separate blog page.
During the theme development project, I studied several themes that I considered exemplary to identify the best practice in theme development. Most of the themes I studied were from Automattic, and others were from Anders Noren, Brian Gardner and Mike McAlister. From these themes, I studied how they approach templates creation, when to have a separate style.css file, how they configure themes’ typography & spacing, and also when to use functions.php.
After careful consideration and learning from these examples, I decided to create the following templates:
- Front Page
- Blog Home
- Pages
- Single Posts
- Pages: 404
- Search Results
The Front Page template includes only a post content placeholder, which will render the content from the user’s static homepage. As for the content of the homepage, I created a landing page pattern that is unsynced, which the user needs to insert into their designated static homepage. While the Blog Home template will render the content from the user’s designated blog page.
I’ll continue the process of creating patterns in the pattern section below.
Template parts creation
- Tall Header
- Header
- Footer
- Sidebar
- Post Meta
- Comments
If a template must be created right in the Site Editor, a template part can be created inside a template or directly in the Site Editor. If you created a template part from within a template, you need to right-click the group of blocks that you intend to use as a template part, and then select “Create template part” option. This template part will then be available for any templates.
For all the header and footer template parts, I created them directly in the Site Editor. However, for the sidebar, post meta, and comments, I created them within the Single Post template. This is because the construction of the latter template parts need to be contextual for a single post layout.

Among the list of template parts mentioned above, the most challenging one is the sidebar template part. This is because it requires several customization that cannot be done via the Site Editor. One of these customization is that every post in the latest blog post block needs to be separated by lines at the top and bottom. Unfortunately, the list item block does not yet support border and padding properties. Therefore, I needed to add a custom class for the latest post block and apply custom CSS to it. However, this only needs to be added locally, as the style only needs to be applied to this particular latest blog post block.
I added class name posts-list-sidebar to the group of latest blog post blocks and then opened the Global Style panel to access the Additional CSS field. In that field, I inserted border-bottom and border-top properties for the list element of the newly added class name.
Custom CSS
This is the complete custom CSS that accompanies the theme. You can see that the customization is very minimal.
/* Front Page Template */
/* remove post content block top margin in a front page template */
:where(.wp-site-blocks) > * {
  margin-block-start: 0;
}

/* Pages Template */
/* add a custom title for the pages template to differentiate it from the post title */
.page-title {
font-size: 0.815rem;
font-weight: 800;
}


/* Sidebar Template Part */
/* add thin line at the bottom of each list items */
.posts-list-sidebar li {
border-bottom: 1px dotted black;
padding: 5px;
}

/* add thin line at the very top of a list item */
.posts-list-sidebar {
border-top: 1px dotted black;
}

/* add underline link on hover for the latest post block at the sidebar */
.posts-list-sidebar a:hover {
text-decoration: underline 2px;
}


/* styles comment author and comment link for the latest post block at the sidebar with bolder font */
.wp-block-latest-comments__comment-author, .wp-block-latest-comments__comment-link {
font-weight: 800;
}
Patterns creation
- Landing Page
- Sticky Navigation
What I personally find to be a delightful feature in the new WordPress is patterns. This feature alone has solved two significant problems for me: design reference and theme demo data import. I’m not a designer, but I’d like my theme’s layout to look decent. Proper spacing and headings level can be challenging. That’s why, in this project, I’m using another theme as a foundation to build my theme on. However, it doesn’t mean I won’t be learning web layout design. On the contrary, the new WordPress has provided me with a great visual theme builder where I can inspect the underlying structure of any interesting themes and study what makes them stand out.
Another problem I typically encounter after installing a new theme is setting it up to look like the demo. In most cases, themes provide demo content that needs to be imported. However, I found this process to be complicated, as it unnecessarily populates my site with content that I will need to modify or remove later. I’ve discovered that this is a common issue for many users. That’s why, when the pattern feature came to WordPress, it easily replaced demo content by providing users with a gallery of specific content, such as various call-to-action sections or subscription sections, and even some variation of full-page patterns that user can insert as needed.
Along with this new functionality, and after studying the previous themes I mentioned earlier, I decided to replicate the Twenty Seventeen homepage as a full-page landing page pattern. This way, users will only need to insert the pattern into their designated static homepage. Since it is an unsynced pattern, users can edit the content of their page without affecting the original pattern.
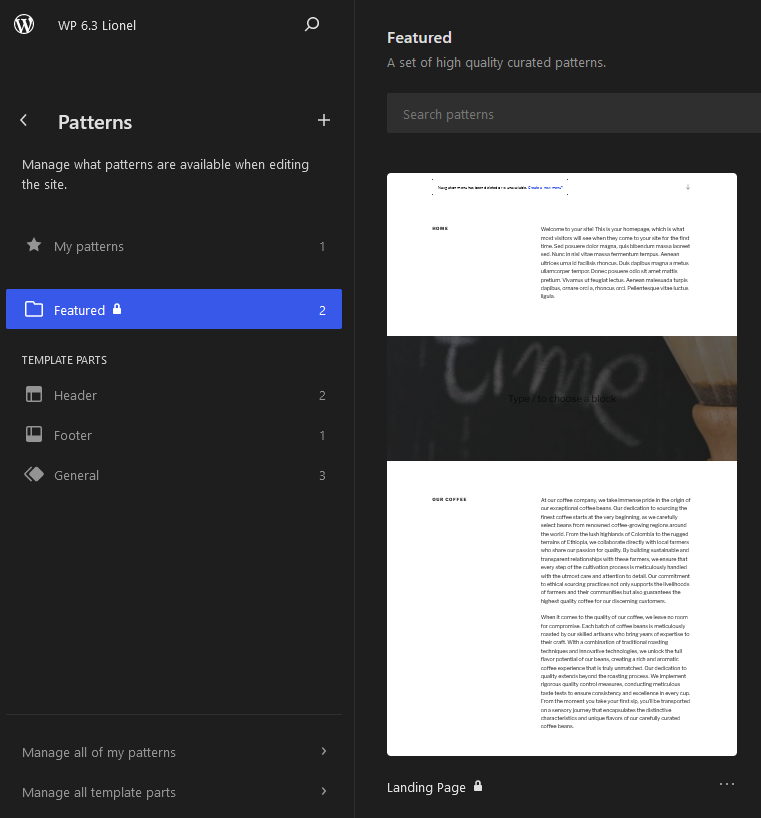
The creation of pattern, whether synced or unsynced, can be done in the Site Editor. However, the pattern will be saved in the database as a user’s pattern and will be listed under “My Pattern” section. To have it prepackaged in a theme, the pattern needs to be registered in our tseventeen block theme.
I then followed these steps to quickly register the landing page pattern in the theme.
- Created a /patterns folder under the theme’s root directory.
- Created a PHP file under that /patterns folder, and named it
landing-page.php. - Opened and edited the PHP file with my preferred code editor.
- Inserted the pattern’s title, slug, etc., as HTML comments and wrapped them with PHP open/close tags. These constitute the pattern’s header section.
- Copied the WP block markups from the Site Editor and pasted them below the pattern’s header section. See the sample code below.
- Saved the changes to
theme.jsonfile. Refer to the section on checkpoint above.
<?php
/**
 * Title: Landing Page
 * Slug: page-landing
 * Categories: featured
 */
?>
<!-- wp:group {"align":"full","style":{"spacing":{"margin":{"top":"0"}}},"layout":{"type":"constrained"}} -->
....
Until now, the process of replicating the classic theme has relied solely on core blocks. Unfortunately, we cannot continue using them because, at present, the core blocks do not provide a way to insert SVG icons in the Site Editor. To address this limitation, I turned to The Icon Block plugin to help me insert a down arrow for the navigation page and a folder icon for the blog post meta.
The last element I want to discuss is the creation of sticky navigation. Initially, I thought the navigation would form the header, as it commonly does, but its sticky function doesn’t allow that. To make the navigation stick to the very top of a page, it needs to be placed inside templates, not the template part, where the sticky element would appear.
Thus I placed the sticky navigation in page and post templates, as well as inside the landing page pattern.
What cannot be recreated without some code
The post meta template part is supposed to include a Post edit link, but this can only be achieved by inserting code, either using a snippet plugin or creating a function in the functions.php file. This is because there’s currently no post edit link block available in the Site Editor. Perhaps it will be added in the future. I will try to open an issue on the Gutenberg repo and seek feedback.
The full integration of Phase 2 into WordPress core has enabled users to build a complete website using only blocks and with very minimal custom CSS. Although block theme development is not as easy as I thought before, as it requires some experimentation and learning, which is something that users need to spend sometime on. However, the resulting theme is working as expected and closely resembles the Twenty Seventeen classic theme. I’m confident that the current limitation will be overcome in the foreseeable future release. I hope this documentation is useful to anyone who is planning to migrate their classic theme to a block theme or anyone interested in block theme building. Any feedback would be greatly appreciated.
Share your thoughts